

Tue, Apr 21, 2015


This is an example of implementing drag and drop functionality using React. This is the first example where we'll use an external library, in this case, React DnD.
August 2018: Please note that this post was written for an older version of React. Changes in the code might be necessary to adapt it to the latest versions and best practices.
Components
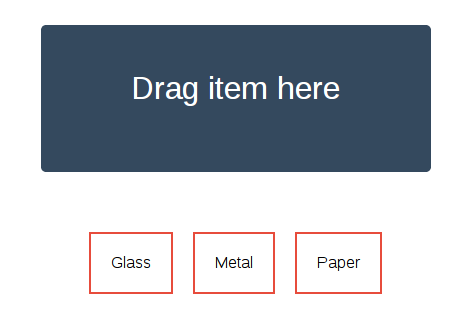
This example will have two major components: Bin, a component where objects can be dropped, and Item, an item that can be dragged and dropped.
React DND, as you would expect, supports applying different functionality to different sets of data that is to be dragged and dropped. We declare the different types of item in the ItemTypes object, which is simple since in this example we only have one type of draggable item:
First, we define the Item component, and declare it draggable. Because React DND, like the underlying HTML5 drag-and-drop API, supports dragging data as well as visible objects, we have to decalare what kind of data should be moved along with the component. The beginDrag function does it, and in this case we only carry the component's name, since it's the only data it has.
Next we define the component we can drop objects into. The Bin component has a list of dropped items in its state, and an addItem method which takes the name of an item to add to that list.
Now we register the dropTarget function, which calls addItem when an object is dropped into the bin:
Here we have the render function. We look at the component's drop state to see whether:
- Nothing is happening.
- A droppable object is being dragged.
- A droppable object hsa been dragged over the component.
We use this to change the component's class name, then later we'll use CSS to style it.
We also query the component's drop state to determine whether the text on the bin should read "Release to drop: or "Drag item here".
Finally, we create a small container object for this example and add some example items:
Style
Now it's time to add some CSS.
First, some general style:
Now we make the bin a big square in the middle:
We used CSS classes to mark up the different states of the bin, so now let's use those to change the color of the bin to match the state:
Since we show a list of items that have been dropped inside the bin, let's style that:
And finally, the items that can be dropped:
Wondering how AI can help you?

© 2025. All rights reserved.